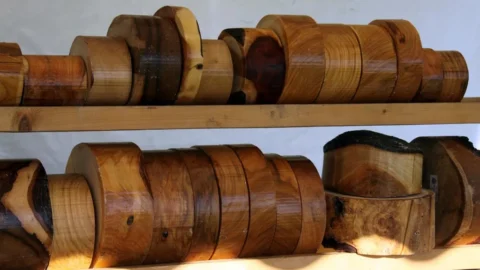
For most projects, the best way to finish cherry wood is a clear coat of polyurethane or lacquer, which protects the wood and lets the grain show through. [1] Whichever finish you pick, sand the wood smooth before you apply it. [1] Learn more in Best Wood Glue for Furniture: 5 Picks for Builds and Repairs.
A clear finish also suits cherry’s main quirk: it reacts to light and darkens over time. [2] As it matures, the wood deepens in hue and takes on a more lustrous look. [3] Under a clear coat, a fresh pale tabletop can develop that warm, rich color on its own, with no stain needed.
Below, you’ll find five finishes that work on cherry: polyurethane, lacquer, oil, stain and paint. You’ll also see when each one makes sense, so you can match the finish to how hard the piece will be used and the look you want.
Prep first: sanding and evening out cherry’s color
Good prep is what makes any cherry finish look even, so do your final sanding and deal with uneven color before the first coat goes on. Cherry reacts to light, and that reaction only reaches the surface, which means most blotchy color is easy to fix at this stage. [2]
This step belongs on the list because it suits every cherry project. It matters most if you’re working with stored boards that have dark patches or the outline of another board that once covered them.
Sand fine, and sand late. Cherry needs fine-grit sanding within 24 hours of finishing. [4] It adds time, but it gives you a more uniform finish, so plan to sand the day you apply your first coat. [4]
Plane and sand away discoloration. When you plane and sand the boards, the light-related color differences even out. [2] Boards that sat in a dry basement for years can come out looking fresh.
Let the sun even things out. You can also leave the pieces in the sun, and the light areas will catch up to the darker ones. [2]
Keep the top clear while it darkens. If you leave a bowl on a cherry tabletop, there will be a lighter spot under it after a couple of weeks. [2] Take the bowl off and that spot will darken to match the rest over time. [2]
That last point matters after the piece is finished too. For the first few weeks, move lamps, vases and fruit bowls around now and then. Keep the surface clear when you can, so the color deepens evenly across the whole top.
Clear polyurethane for tough, everyday protection
Clear polyurethane is the pick when you want cherry to look like cherry and still stand up to daily use. A clear coat protects the wood and lets the grain show through, so you see the board’s figure instead of a layer of color [1].
Why it’s on the list
Cherry pieces often live in hard-working spots. Think of a kitchen table that gets plates slid across it every night, or cabinet doors that get opened a dozen times a day. Choosing a finish depends partly on how much wear and tear the piece will face and where it will live [5]. Polyurethane builds a protective film on the surface. That makes it a sensible match for those high-traffic jobs.
It also works with cherry’s best trait instead of against it. Exposure to light darkens cherry over time, taking it from a light, pinkish hue to a deep, rich red [5]. A clear coat doesn’t block that change, so the color keeps maturing under the finish for years.
Key points
Look: keeps the natural grain visible, with no added color [1]
Best for: tabletops, desks, kitchen and bathroom cabinets, and other surfaces you touch and use daily
Color over time: the wood still deepens from pinkish to rich red underneath [5]
Less ideal for: pieces where you want a soft, hand-rubbed feel or a darker tone right away
Who it suits
Polyurethane suits you if you’re building or refinishing something that will see real use and you’d rather wipe it clean than baby it. It’s also a good fit if you love cherry’s natural aging and want a finish that simply lets it happen.
Lacquer for a classic furniture finish
Lacquer earns its spot on this list because it gives the best results when you’re refinishing cherry furniture. [6] If you have an older dresser, table or chair with a worn or damaged finish, lacquer is the finish to reach for to bring back a polished, classic furniture look. [6]
Why it’s on the list
Lacquer guards the wood beneath it against scratches and stains. [6] Compared with an oil finish, lacquer tends to be easier to care for, though it may not develop the same rich patina over the years. [1] That trade-off makes it a good pick when you want a low-maintenance, polished result.
What you need
Lacquer
A paintbrush
Sandpaper
A hand block to wrap the sandpaper around
That short list comes straight from what refinishing cherry furniture calls for. [6]
How it goes on
First, sand the furniture to remove the existing finish. [6] An electric sander is the easiest way to handle large surfaces like a tabletop, while sandpaper wrapped around a hand block works for smaller areas such as legs or drawer fronts. [6]
Next, brush on a thin, even coat of lacquer, keeping your strokes in the direction of the grain. [6] Once it dries, you can add a second or third coat for more protection and a shinier appearance. [6]
Who it suits
You’re refinishing a cherry piece rather than finishing raw lumber.
You prefer a polished look over a soft, hand-rubbed one.
You want a finish that’s simple to maintain day to day.
Natural oil finish for a hand-rubbed look
A natural oil finish is the pick when you want cherry to look and feel like wood, not like it’s under a coating. Some woodworkers choose oil over a modern lacquer for exactly that reason. [1] If your goal is to keep the wood’s natural beauty, oil is likely the best option, while lacquer suits you better if you want a more polished look. [1] Related reading: Best Stain for Cherry Wood: 5 Options and How to Choose.
Why oil makes the list
Oil gives a softer, low-sheen surface you can rub in by hand. Over time, an oil finish can build a richer, deeper luster than lacquer. [1] Lacquer may not develop the same rich patina that an oil-finished cherry piece does. [1] That pairs well with cherry’s own aging: light exposure darkens the wood from a light, pinkish hue to a deep, rich red. [5]
The trade-off is upkeep. Oil finishes can require more maintenance than lacquer, which tends to be easier to care for. [1] Plan on refreshing the surface now and then instead of applying it once and forgetting it.
Who it suits
The deciding factor is how much wear the piece will see, along with the look you want and where it will live. [5]
Good fit: a cherry jewelry box, picture frame, bookshelf or bedside table that gets light handling.
Good fit: you enjoy a hand-rubbed feel and don’t mind occasional touch-ups.
Less ideal: a kitchen table or desk that takes daily spills and scrapes, where a tougher film finish holds up with less fuss.
Less ideal: you want a glossy, polished surface.
Staining cherry darker without blotches
Staining cherry with a dark color like walnut or mahogany gives it a richer, deeper look right away instead of waiting for it to age. [1] It’s on this list because it’s the fastest route to a dark finish, but cherry is one of the trickier woods to stain evenly, so it suits people willing to add a couple of prep steps.
Why cherry goes blotchy
Cherry’s wavy grain changes how porous the wood is from spot to spot. [4] Some areas soak up stain fast and turn dark, while others stay light, which is why first attempts often end up blotchy. [4] On a tabletop, that can look like dark patches scattered across an otherwise even board.
How to stain it evenly
The fix is pre-treatment before the stain goes on. [4]
Preview the problem spots: Rub the wood with mineral spirits to see where porosity varies and may need pre-sealing. [4]
Washcoat: Brush on a thinned sealer first to help prevent uneven staining. [4]
Apply the stain: Use a paintbrush and follow the direction of the grain, then let the stain dry before moving on. [6]
Topcoat last: Put the stain on before the clear topcoat, such as lacquer, never over it. [6]
For example, on a cherry side table you’d rub it with mineral spirits, washcoat the thirsty end grain and wavy areas, stain with the grain, and then brush on your clear coat once the stain is dry.
Who it suits
Staining fits you if you want a dark look now, or need new cherry to match older, darker furniture. If you’re happy to let the color deepen on its own, a clear finish is simpler.
Paint for a modern white or black look
Painting cherry white or black gives the piece a clean, modern look, but you give up the grain and the deepening color that make cherry worth buying in the first place. [1] It earns a spot on this list because it works, not because it suits most cherry projects.
Why paint makes the list
A solid coat of white or black turns a traditional-looking cherry dresser or side table into something that fits a contemporary room. [1] Think of a dated cherry nightstand repainted matte black to match a modern bedroom, or a cherry bookshelf painted white so it blends into a bright, minimal space.
Paint also gives you full control over color. Cherry changes shade as it’s exposed to light, while a painted surface stays the same color you chose on day one.
What you give up
Paint covers everything cherry is known for:
The grain disappears. The figure and texture you’d see under a clear coat are hidden under an opaque layer.
The color stops aging. Cherry’s rich, darkening tone develops under a clear finish, but under paint, nobody will ever see it.
It’s hard to undo. Getting back to bare cherry later means stripping and sanding the paint off.
Who it suits
Paint is a good fit when the piece’s style matters more than the wood showing through. It works well for older, worn or mismatched cherry furniture you want to update, or for a build where cherry was simply the board you had on hand.
If you chose cherry specifically for its warm color and grain, skip paint and pick one of the clear or oil finishes instead.
Which cherry finish fits your project?
Pick your cherry finish by three things: the final look you want, how much wear the piece will take, and where it will live. [5] A busy kitchen table needs different protection than a bedside chest that mostly gets looked at.
Match the finish to the job
Heavy use (tabletops, cabinets): go with polyurethane for a tough clear coat.
Refinishing old cherry furniture: use lacquer, which gives the best results on refinishing jobs. [6]
A soft, natural look: choose an oil finish if you want the wood to keep its natural beauty. [1]
Upkeep matters too. Oil finishes can need more upkeep than lacquer, but they can build a richer, deeper luster over time. [1] Lacquer is easier to care for, though it may not develop the same rich patina as an oiled piece. [1]
Comparing clear, oil, stain and paint
Finish | Look | Grain | Care |
|---|---|---|---|
Clear (polyurethane or lacquer) | Polished, protective | Shows through | Lacquer is easier to care for |
Oil | Natural, deepening luster | Shows through | More upkeep |
Stain (walnut, mahogany) | Richer, darker | Shows, color changed | Needs a clear topcoat over it |
Paint (white or black) | Modern | Hidden | Not covered here |
Clear coats and oil both let you enjoy cherry’s grain, and the real trade-off is protection and easy care versus a hand-rubbed glow. Stain shifts the color darker right away instead of waiting for it to age. Paint changes the wood’s character completely, so save it for pieces where you want a modern color more than cherry’s natural look.
Getting a finish you’ll enjoy for years
The one thing to remember: cherry looks its best when you let it age under a clear finish. Sand the wood smooth, choose a clear coat such as polyurethane or lacquer, and the grain stays visible while the wood is protected. [1] Freshly sanded cherry starts out pinkish and darkens over time into a rich, reddish color, so the piece you finish today will look warmer a year from now. [4]
If you want a darker color right away, stain only after pre-treatment. Pre-sealing with a washcoat of thinned sealer helps prevent uneven staining. [4] For your next step, sand a scrap of cherry and test your chosen finish on it first.