The Milwaukee Packout Customizable Work Top (model 48-22-8488) turns the top of your Packout stack into a small wood workbench with a 50 lb weight capacity and a fastener-ready mounting surface. [1] That makes it a good fit for light assembly and repair work on a mobile stack, and a poor fit for heavy-duty bench work. For more detail, see Milwaukee Packout 2 Wheel Cart: What It Carries and Who It Suits.
The fastener-ready design lets you attach a vise, a charger and other gear right to the top. [2] If you already roll your boxes around the shop or jobsite, you get a work surface that goes wherever the stack goes.
Below you’ll find how the top is built, what you can mount on it, how it sits on a cart stack, how to replace a worn surface and when it’s worth buying for cutting or assembly.
How it’s built and how much it holds
The work top pairs a tough plastic body with a real wood surface, and it is rated to hold 50 lb. That combination tells you what kind of work it handles well: light clamping, fastening and small-parts jobs, not heavy beating or big stock.
Materials: polymer body, marine grade wood top
The body is made of impact resistant polymers, and the working surface is a ½” marine grade wood top. [3] In practice, the shell can take the knocks a jobsite stack gets, like bumping a doorframe or riding in a truck bed. The wood gives you a flat surface that feels like a small bench instead of a box lid.
Marine grade wood is plywood made to stand up to moisture better than ordinary sheet goods. That helps if your stack lives in a damp garage or sits in a truck overnight.
What 50 lb of capacity covers
The work top carries a 50 lb weight capacity. [1] Think of that as the total of everything on it at once: what you mount plus what you set on it while you work.
That budget covers more than you might expect for small jobs:
A small bench vise holding a dowel or a short piece of trim
A tray of screws, hinges and drill bits
A cordless drill or driver and a couple of batteries
A small project such as a drawer front or a birdhouse during glue-up
It is the wrong surface for heavy work. Pounding chisels into thick hardwood, hammering a stuck joint apart, or resting a long, heavy board across it puts more load and shock on it than a 50 lb rating suggests it was built for. Do that kind of work on a sturdy shop bench or sawhorses.
Why the wood top matters for mounting
The top is a fastener-ready mounting surface. [1] You can drive wood screws straight into it to hold a vise, a charger bracket or a parts bin, the way you would on a workbench.
The plastic lids on regular Packout boxes don’t offer that. Screwing through a box lid leaves holes in the shell. The wood work top gives you one dedicated layer where drilling and screwing is the whole point.

What can you mount on it?
You can bolt vises, chargers and other gear straight to the work top, because its fastener-ready design is made for attaching them. [2] That turns the lid of your stack into a small station set up for the jobs you do most, so you’re not hunting for a clamp or a free outlet each time.
A small vise for sawing and drilling
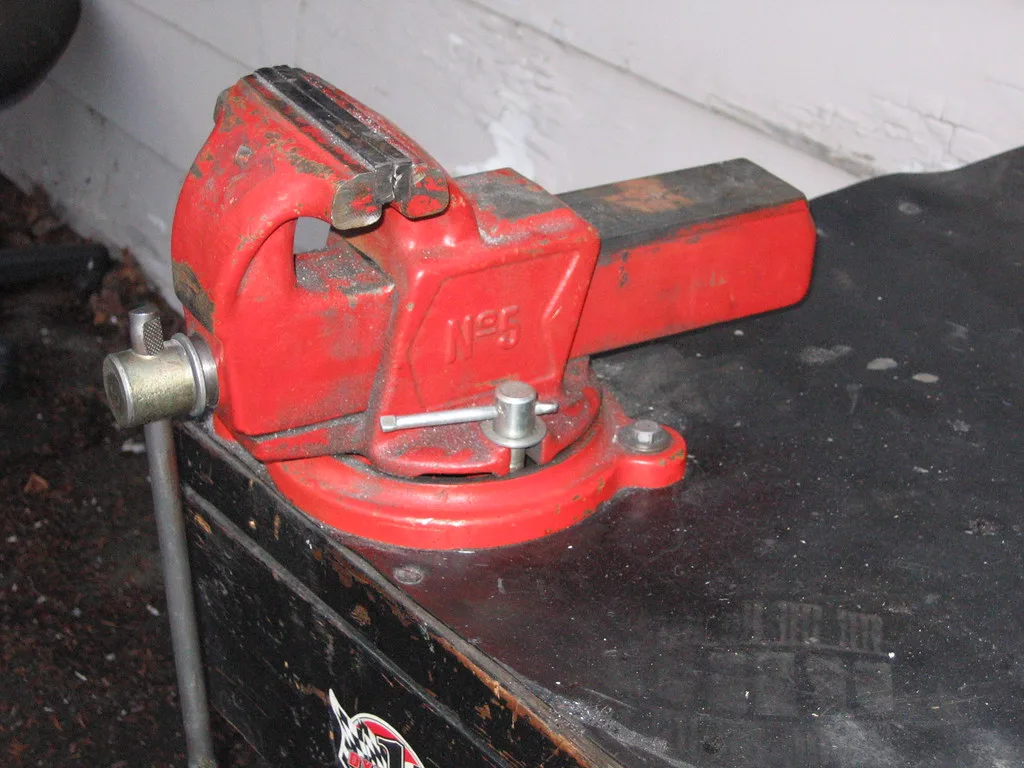
A small vise is the most useful first mount for most people. Screw it near one corner, and you have a steady way to hold a short length of dowel, a piece of 1×2 trim or a strip of metal while you cut it with a hand saw or drill a pilot hole.
Put the vise near an edge so the jaws hang slightly past the top. That leaves room for a saw blade to pass below the stock without hitting the work top, and it lets longer pieces extend out to the side. Keep cuts short and light, since the work top is a mobile surface and not a heavy bench.
Chargers and other gear
Chargers are the other common mount. [4] A battery charger fixed to one end keeps packs topped up while you work, and the cord stays in one predictable spot instead of trailing across the surface.
Other handy mounts include:
A small parts tray for screws and bits during assembly
A holder for the drill or driver you reach for most
A tape measure or pencil clip at the front edge
Plan the layout around the 50 lb limit
The work top is rated for 50 lb. [2] That total covers everything you mount plus whatever you press or set on it, so a heavy vise and a charger can use up much of your budget before you start working.
Lay your gear out on the surface before drilling any holes. Add up the weights from each item’s spec sheet, then leave a margin for the stock in the vise and the force you put on it. Place the heaviest piece toward the middle and lighter items at the ends, so the load is spread out and you still have open space to work.
Using it on top of a Packout cart stack
The work top goes on the very top of your stacked Packout boxes, so the stack doubles as a small bench. Your tools stay in the boxes below and the flat surface sits above them, where you can set a part down, clamp it, or plug in a charger. The work top is designed as a portable surface for Packout toolboxes, aimed at assembly and repairs. [5]
The top layer is your bench
Treat the work top as the cap of the stack. Put it on last, after the boxes you need are in place, so nothing ends up stacked on your work surface.
A typical three-level setup on a cart might look like this:
A large tool box on the bottom with drills, saws and batteries
An organizer or drawer unit in the middle with screws, bits and small parts
The work top on top, with a small vise or charger attached
This order puts loose hardware right under your hands. You can open a drawer, grab a fastener and set it on the top without walking anywhere.
Roll the bench to the job
With the stack on a cart, you bring the surface to the work. If you’re fixing a gate latch at the back fence or assembling shelves in a spare room, you wheel the whole station over and start. You skip the trips back to the garage for a forgotten bit.
This is handy for jobs spread across a property. Roll the stack to the first window you’re repairing, finish it, then move on to the next one, with your vise and parts tray still in place.
Keep the heavy boxes low
Put your heaviest box at the bottom of the stack so the station stays steady while you work on it. A low center of weight makes the stack less likely to tip when you lean on the top or tighten something in a vise.
A practical rule is to order boxes from heaviest to lightest, bottom to top. Batteries and power tools go low, and lighter organizers sit just under the work top. Park the cart on level ground before you start, and the surface will feel more like a bench and less like a cart.
Can you replace a worn top?
Yes. If the wood surface is chewed up from years of screwing vises and brackets in and out, you can swap it for a plastic replacement insert sold by Packible. It’s a third-party part, not a Milwaukee product, so treat it as an aftermarket upgrade.
What the replacement insert is
The insert is precision CNC machined from solid HDPE and made to fit the Milwaukee Packout customizable work top. [6] HDPE (high-density polyethylene) is the same family of tough, slick plastic used in cutting boards and outdoor furniture. CNC machining means a computer-guided cutter shapes the panel, so it can match the original top’s outline closely.
The seller lists the kit as compatible with model 48-22-8488, which is the customizable work top. [6]
When it makes sense
The usual reason to swap is a top that no longer holds fasteners well. Picture a surface where you’ve moved a bench vise three times, added a charger bracket, then pulled it off again. Each round leaves stripped or overlapping holes, and new screws start landing in wood that’s already been torn up.
At that point you have two choices:
Patch the old wood, by filling holes with glue and dowels or shifting your layout to fresh spots.
Replace the whole surface with the HDPE insert and start your layout over on a clean panel.
Patching costs almost nothing and works fine if the damage is limited to one corner. A full replacement is the cleaner route when the damage is spread across the top or the wood is starting to split.
Keep in mind it’s aftermarket
Because Packible makes this insert, Milwaukee doesn’t sell or support it. Questions about fit, hardware or returns go to the seller. Also expect plastic to behave differently from wood when you drive screws into it, so plan your mounting hardware for an HDPE panel rather than reusing the exact screws from the original top.
Is it worth adding for cutting or assembly?
The work top earns its place if your jobs are mobile assembly, small repairs or a rolling charging station. It is a weaker fit if you mostly rip plywood or break down heavy stock.
Where it pays off
The top is built around a fastener-ready surface that takes vises, chargers and other items [2]. That makes it good at turning a box stack into a small bench that goes wherever the work is.
A few setups where it makes sense:
A repair station for a service van, with a small vise for holding a broken chair rail while you glue and clamp it
An assembly surface for flat-pack cabinets or shelving, where you need a clean spot for hardware and a drill
A charging station with chargers screwed down, so batteries top off on the same stack you roll to each room
A punch-list cart for trim work, holding a coping saw, a block plane and small parts at waist height
In each case the loads are light and the value comes from having a dedicated, fixed surface instead of balancing tools on a box lid.
Where it falls short
The 50 lb weight capacity is the limit that decides most cutting questions [1]. A full 4 x 8 sheet of 3/4 in plywood, or a benchtop saw plus the stock you feed through it, can push past that quickly. For those jobs, sawhorses or a folding table will carry the weight and give you a wider surface.
The top also stays the size of the stack, so long boards and large panels hang off the edges with no support. Light cutting works better: trimming a piece of molding held in a vise, or cutting dowels and small blanks with a handsaw.
Price and reviews
Buyers rate it well, with a 4.7 average across 414 ratings on one major U.S. retailer [2]. That suggests most owners are happy with it for the light-duty role it is designed for. Prices for Packout accessories shift with sales and bundles, so check the current price on retailer pages before you buy.
Setting up your first work top
Start with the one tool that will do the most work on the top, and for most people that is a small vise. Mount it near one corner so you have open wood beside it for parts and a cordless drill, then add a charger or other gear around it as you find gaps in your routine. The top’s fastener-ready surface is made for attaching vises, chargers and similar items [2].
Once the first piece is mounted, set the top on your cart stack and roll it to your next project. Clamp a board, make a cut or drill a few holes. You’ll quickly learn whether the layout needs adjusting before you add anything else.